Achieving a clean, professional key isn’t as simple as dropping your footage into a timeline and applying a preset. If you’ve ever struggled with fringing, uneven backgrounds, or unnatural spill, you’re not alone.
In this guide, we’ll walk you through the essential steps for perfect chroma keying in both Final Cut Pro and Adobe Premiere Pro. Whether you're producing YouTube videos, corporate content, or short films, these techniques will help you key like a pro.
Why Green Screen Matters
Green screen (or chroma keying) is the technique of isolating and replacing a coloured background — typically a vibrant green — with another video or image. It’s widely used across the film, TV, and social media industries, but it can go from Hollywood to horror show if not done correctly.
1. Lighting: The Foundation of a Clean Key
A flawless key starts before you even open your editing software. Lighting your scene properly is critical.
✅ Tips for Ideal Green Screen Lighting:
-
Even Lighting on the Background: Use softboxes or LED panels to light the green screen evenly. No hotspots or shadows.
-
Separate Subject from Background: Place your subject at least 4–6 feet away from the green screen to reduce spill and shadows.
-
Use Backlights or Hair Lights: Helps define your subject and reduce green edges.
-
Match Foreground and Background Lighting: If your background plate has a warm light source, your subject should be lit accordingly.

2. Shooting Tips for Better Keying
-
Use a High-Quality Camera: 4:2:2 or 4:4:4 colour sampling gives you better keying results than 4:2:0 (common in compressed formats).
-
Shoot in Flat or Log Profiles: This gives more flexibility when colour correcting after keying.
-
Avoid Green Clothing or Reflective Surfaces: Self-explanatory — but surprisingly common!
3. Keying in Final Cut Pro: Step-by-Step
Final Cut Pro makes keying relatively intuitive with its Keyer effect.
How to Key in Final Cut Pro:
-
Drag the Keyer Effect onto your green screen clip.
-
FCP will auto-detect the green screen — but you can improve the key by refining the settings.
-
In the Inspector Panel, adjust the following:
-
Strength: Balances transparency of your background.
-
Fill Holes: Useful if your subject has transparent elements like hair or lace.
-
Edge Distance / Edge Softness: Smooths out rough outlines.
-
-
Use Sample Colour with the eyedropper tool if FCP doesn’t pull the perfect green by default.
-
Fine-tune with the Colour Selection and Spill Suppression options for realistic blending.
4. Keying in Premiere Pro: Step-by-Step
Premiere Pro uses the Ultra Key effect, which offers deeper manual controls.
How to Key in Adobe Premiere Pro:
-
Apply Ultra Key (Effects > Video Effects > Keying > Ultra Key).
-
In the Effect Controls panel, select the eyedropper and choose a representative green section.
-
Change the Output dropdown to Alpha Channel to see how clean your key is — black should be 100% transparent, white should be 100% opaque.
-
Adjust these settings:
-
Matte Generation: Tweaks Transparency, Highlight, Shadow, and Tolerance.
-
Matte Cleanup: Use Choke and Soften for edge control.
-
Spill Suppression: Reduces green bleed on hair or edges.
-
-
Once your alpha is clean, switch Output back to Composite.
5. Fine-Tuning for Perfection
Use Garbage Mattes:
Crop out areas that don’t contain your subject to improve processing power and eliminate distracting edges.
Colour Grade Post-Key:
Once the key is in place, use adjustment layers or Lumetri Colour (Premiere) or Colour Board (FCP) to match your subject with the background in terms of tone, saturation and contrast.
Add Shadows or Light Wraps:
To ground your subject in the scene, consider adding fake shadows or using light wrap plugins to blend edges more naturally.
6. Speed Up Your Workflow with Editors Keys Shortcut Keyboards
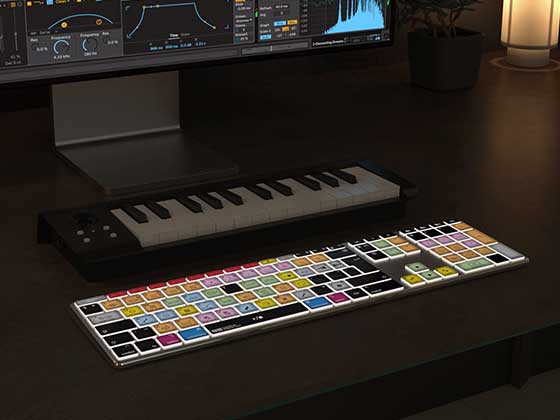
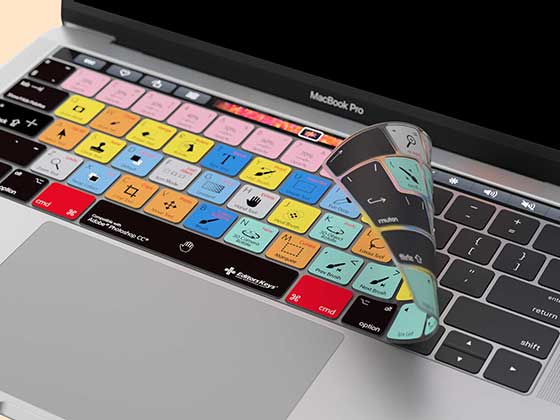
Whether you're editing in Final Cut Pro or Premiere Pro, one of the easiest ways to streamline your green screen workflow is by using a dedicated Editors Keys keyboard or silicone keyboard cover.
Why Editors Keys Make a Difference:
-
Faster Navigation: Instantly access key tools like the Keyer or Ultra Key effect without hunting through menus.
-
Reduce Mouse Clicks: Apply effects, switch views, and toggle output channels (like Alpha or Composite) using simple shortcuts.
-
Built by Editors for Editors: Each keyboard is designed with colour-coded keys and labelled shortcuts for your specific software – reducing learning time and speeding up your edits.
-
Designed to Last: Whether you’re working on a MacBook, iMac, or PC, our keyboards are made for long editing sessions with high-quality materials.
👉 Explore Editors Keys keyboards for Final Cut Pro and Premiere Pro here.
Conclusion
Mastering green screen isn’t just about dragging and dropping — it’s about understanding how lighting, shooting, and software all interact. By following the steps outlined above and incorporating professional tools like Editors Keys shortcut keyboards, you’ll not only get cleaner keys but dramatically improve your post-production speed and quality.
Want more editing tips, gear recommendations, and workflow hacks? Stay tuned to the Editors Keys blog for expert advice from the creative frontlines.
